Be sure to read our policy on citing sources before editing!
Difference between revisions of "Gobi's Valley"
(→Names in other languages: updating with another category) |
|||
| (99 intermediate revisions by 50 users not shown) | |||
| Line 1: | Line 1: | ||
{{Infobox world | {{Infobox world | ||
| | |image=[[File:Gobi's Valley (B-K).png|200px]] | ||
|game = [[Banjo-Kazooie]] | |game=''[[Banjo-Kazooie]]''<br>''[[Banjo-Pilot]]'' | ||
|theme=Desert | |||
| | |jiggies=32 | ||
| | |transformation=N/A | ||
|transformation = | |||
}} | }} | ||
'''Gobi's Valley''' is the sixth world [[Banjo]] and [[Kazooie]] visit in ''[[Banjo-Kazooie]]''. The entrance of this level is found early, on the fifth floor of [[Gruntilda's Lair]], just before [[Freezeezy Peak]] and inside a desert-like room. However, its picture is located in the sixth floor "lava room", just shortly after said room. The picture requires 9 [[Jiggies]] to complete, and Banjo effectively needs 32 in total to access the area on top of the 23 Jiggies he needed for the prior levels. | |||
This is the final world [[Bottles]] appears in to teach the duo new abilities. He only teaches [[Turbo Talon Trot]] to them. | |||
==Points of | ==Points of interest== | ||
*Oasis | |||
*King Sandybutt's Tomb | *King Sandybutt's Tomb | ||
*Ziggurat | |||
*Rubee's Pyramid | *Rubee's Pyramid | ||
*[[Jinxy]] | *[[Jinxy]] | ||
*[[Blue Mystery Egg|Ancient Door]] | |||
*Puzzle Pyramid | |||
* [[ | *[[Grabba]]'s Island | ||
*[[Gobi]]'s Island | |||
==Collectibles== | ==Collectibles== | ||
===[[Jiggy|Jiggies]]=== | ===[[Jiggy|Jiggies]]=== | ||
#Grab the | #'''Grab Grabba's Jiggy:''' Grab the Jiggy from [[Grabba]] using the [[Turbo Trainers]] near the Water Pyramid (or by using a well-timed Beak Bomb). | ||
# | #'''Complete the Matching Puzzle:''' [[Beak Bust]] the switch on top of one of the pyramids and quickly run into the newly opened doorway. Inside, Beak Bust the tiles around the floor to match up pairs of characters or items within the time limit. Once successful, a Jiggy will appear in the center of the room. The solution is listed below. | ||
# | #'''Clear King Sandybutt's Tomb: '''In the center of the world, carefully jump onto the small pillars atop the moat and shoot eggs into the sphinx heads on the wall. Repeat this process with the next two sphinx heads and the main pyramid will rise from the ground in the very center of the moat. (Filling the moat with water will make this task much safer but is not necessary.) Once inside the pyramid, you must navigate your way through the maze within the time limit and once you reach the final room, the Jiggy will be inside a gold sarcophagus. | ||
# | #'''Free Gobi:''' Near the Tile Puzzle pyramid, one will find [[Gobi]] strapped to a rock on a lone island. Ride the magic carpet to the island and use either [[Egg]]s or a Beak Buster on the rock to free him. A Jiggy will pop out of the sand shortly after. | ||
#After | #'''Help Trunker: '''After freeing Gobi, he will retreat to the small oasis at the entrance, seeking shade. Beak Bust his hump to expel his water into Trunker. [[Trunker]] will then elongate and a Jiggy will appear on top of him. To reach this Jiggy, you can [[Flight|fly]] to it, or simply jump onto him from a nearby tree. | ||
# | #'''Search Jinxy's Temple:''' Jump to the cacti from [[Jinxy|Jinxy's]] nose. From there, shoot Eggs into both his nostrils. The door to Jinxy's temple will open and inside you must ride the carpets to the top of the room where the Jiggy awaits. To activate the carpets, you must shoot Eggs into the nearby sphinx heads on the walls, akin to Jiggy #3. | ||
#Fly through all of The Ancient One's rings. | #'''Clear The Ancient Ones Challenge: '''Fly through all five of [[Ancient Ones|The Ancient One's]] rings and the Jiggy will appear on Jinxy's back near the [[Flight Pad]]. Their locations are all near Jinxy aside from one near the Tile Puzzle Pyramid. (The order they appear is random each save file.) | ||
#[[Beak Bomb]] | #'''Help Rubee and Toots:''' [[Beak Bomb]] the [[Kazooie]] target on one of the pyramids and enter before the time limit expires. Once inside, shoot Eggs from Kazooie's behind into the pot circling[[Histup| Histup's ]] basket. When enough eggs are deposited, Histup will emerge and extend himself to the ceiling where the Jiggy awaits. Simply climb Histup to reach it. | ||
# | #'''Access the Water Pyramid:''' Using a nearby pair of Turbo Trainers, step on the switch at the base of the Ziggurat-like building and quickly run to the very top of the structure. Drop into the passage before the time limit expires and swim down to the bottom of the pyramid to collect the Jiggy. (Be sure to collect the [[Mumbo Token]] toward the top of the room ''before'' collecting the Jiggy, as the water inside this temple will drain into the large moat outside once the Jiggy is collected, leaving the Mumbo Token inaccessible.) | ||
#Find all 5 | #'''Find all 5 [[Jinjo]]s.''' | ||
This is the solution to the second Jiggy's puzzle: | |||
{|border=1 style="scope:col" | |||
|- | |||
|3 || 6 || 1 || 1 | |||
|- | |||
|4 || 7 || 8 || 2 | |||
|- | |||
|5 || 4 || 3 || 5 | |||
|- | |||
|7 || 8 || 2 || 6 | |||
|} | |||
An alternate method also exists to access the water pyramid for its Jiggy: the moat that gets filled with the pyramid's water has Fly Pads in the hot sand that Banjo can use to fly into the entrance. This requires a bit more precision, however, and once the moat is filled with water, the Fly Pads become unusable. | |||
===[[Jinjo]]s=== | |||
*'''<font color="blue">Blue</font>''' - At the bottom of the large moat in the center of the world. Can be obtained before or after the moat is flooded, though it is much safer to obtain when the moat is filled. | |||
*'''<font color="green">Green</font>''' - Behind the Tile Puzzle Pyramid.. | |||
*'''<font color="orangered">Orange</font>''' - Inside [[Jinxy|Jinxy's]] Temple. After riding the first magic carpet, turn around to see the Jinjo atop a separate magic carpet. | |||
*'''<font color="fuchsia">Purple</font>''' - Inside King Sandybutt's Tomb, inside of a pink urn in the final chamber. | |||
*'''<font color="#c4a500">Yellow</font>''' - Directly behind the [[Exit Pad]], sitting on a rock. | |||
===[[Extra Honeycombs]]=== | |||
*[[Beak Bust]] a Honeycomb Switch behind the Tile Puzzle Pyramid and [[fly]] into the nearby cactus to collect the Extra Honeycomb Piece. | |||
*After getting Trunker's Jiggy, Gobi will move to the entrance to the Blue Egg's chamber. Beak Bust him again for this Honeycomb. | |||
===[[Witch Switch]]=== | |||
*Inside [[King Sandybutt|King Sandybutt's]] maze. The switch will open a sarcophogus in the fifth floor of [[Gruntilda's Lair]], revealing a [[Jiggy]] inside of it. The Jiggy can be reached using the [[Shock Jump Disc]] circling the large urn. | |||
=== | ===[[Mumbo Token]]s=== | ||
*' | *Above [[Jinxy]]'s nose. | ||
*' | *Inside Jinxy, at the back of the room. | ||
* | *Inside [[Rubee|Rubee and Toots']] Temple. | ||
* | *In an urn in the final chamber of King Sandybutt's Tomb. | ||
*' | *In the Tile Puzzle Pyramid. | ||
*In front of the exit of the Water Pyramid. | |||
*In a corner to the right of Jinxy. Use [[Wading Boots]] to reach it. | |||
*On the surface of the water inside the Water Pyramid. If the Jiggy inside this pyramid is collected, the Mumbo Token will be inaccessible due to the water being drained from the pyramid. | |||
*At the bottom of the moat. | |||
*At the very top of King Sandybutt's Pyramid. | |||
===Extra | ===[[Extra Life|Extra Lives]]=== | ||
* | *In a corner directly behind [[Jinxy]]. Use [[Wading Boots]] to reach it. | ||
*In the maze in King Sandybutt's Tomb. | |||
*At the top of the Water Pyramid. | |||
== | ===[[Stop 'n' Swop]]=== | ||
*'''<font color="#0000ff">Blue Mystery Egg</font>''' - The Blue Mystery Egg is in a room in the back of Gobi's Valley near Gobi's third hiding spot. You must hit the switch to open the sarcophagus, revealing the Egg. | |||
* | |||
==Characters== | ==Characters== | ||
*[[Gobi | *[[Grabba]] | ||
*[[Jinxy | *[[Gobi]] | ||
*[[Trunker | *[[Jinxy]] | ||
*[[ | *[[Trunker]] | ||
*[[Rubee | *[[Ancient Ones]] | ||
*[[Histup | *[[Rubee]] | ||
*[[Histup]] | |||
*[[Hazards]] | |||
*[[Toots]] | *[[Toots]] | ||
==Enemies== | ==Enemies== | ||
* [[Beehive]] | *[[Beehive]] | ||
* [[Mum-Mum]] | *[[Mum-Mum]] | ||
* [[Scabby]] | *[[Scabby]] | ||
* [[Slappa]] | *[[Slappa]] | ||
==''[[Banjo-Kazooie: Nuts & Bolts]]''== | |||
[[File:Sandybutt's Pyramid NnB.png|thumb|Exhibit of King Sandybutt's tomb.]] | |||
{{Quote|Pyramid. This pyramid was torn out of Gobi's Valley in Banjo-Kazooie, much to the chagrin of its owner, King Sandybutt. L.O.G decided to bring it back to exploit its handy sloping sides.|[[Banjoland]] description}} | |||
King Sandybutt's Tomb appears as its own section in Banjoland, and is connected to parts of [[Clanker]] and the snowman of [[Freezeezy Peak]]. It was torn out of Gobi's Valley by L.O.G to use in Banjoland, and it is quite clear that [[King Sandybutt]] was not pleased. This also proves that King Sandybutt is still alive, and he may have moved elsewhere. | |||
==''[[Banjo-Pilot]]''== | |||
Gobi's Valley is a track in [[Banjo-Pilot]] is based off of Gobi's Valley. There are several pyramids that can be seen in the background as well as [[Jinxy]]. [[Gobi]] can also be seen on the course as an obstacle. | |||
==Gallery== | ==Gallery== | ||
<gallery> | <gallery> | ||
Gobi's Valley and items BK artwork render.jpg|Gobi's Valley artwork render | |||
</gallery> | |||
===Areas=== | |||
<gallery> | |||
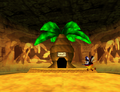
Gobi's Valley (inside of Jinxy).png|Inside of Jinxy | |||
Gobi's Valley (game chamber).png|Game chamber | |||
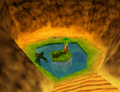
Gobi's Valley (water temple).png|Ziggurat | |||
Gobi's Valley (King Sandbutt's tomb).png|King Sandybutt's tomb | |||
</gallery> | </gallery> | ||
{{ | ===Screenshots=== | ||
[[Category:Banjo-Kazooie | <gallery> | ||
Gobi's Valley entry.png|World entrance | |||
Gobi's Valley start.png|Starting point | |||
Rubee's Pyramid exterior.png|Rubee's Pyramid | |||
Ziggurat interior.png|The interior of the Ziggurat | |||
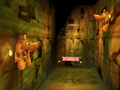
Ancient Chamber.png|The Ancient Chamber of King Sandybutt's tomb | |||
</gallery> | |||
==Nomenclature== | |||
{{Foreign names | |||
|Spa=El Valle de Gobi (''Nuts & Bolts'') | |||
|SpaM=Gobi's Valley | |||
|Fra=Vallée de Gobi | |||
|FraM=Gobi's Valley | |||
|Jap = ゴビバレーさばく | |||
|JapR = Gobi Barē Sabaku | |||
|JapM = Gobi Valley Desert | |||
|Ger = Gobi's Valley | |||
|GerM = Gobi's Valley | |||
|Ita = La Valle di Gobi | |||
|ItaM = Gobi's Valley}} | |||
{{BK}} | |||
[[Category:Deserts]] | |||
[[Category:Worlds in Banjo-Kazooie]] | |||
Latest revision as of 18:19, December 12, 2023
.png)
| |
| Game appearance(s) | Banjo-Kazooie Banjo-Pilot |
| Theme | Desert |
| Jiggy requirement | 32 |
| Transformation | N/A |
Gobi's Valley is the sixth world Banjo and Kazooie visit in Banjo-Kazooie. The entrance of this level is found early, on the fifth floor of Gruntilda's Lair, just before Freezeezy Peak and inside a desert-like room. However, its picture is located in the sixth floor "lava room", just shortly after said room. The picture requires 9 Jiggies to complete, and Banjo effectively needs 32 in total to access the area on top of the 23 Jiggies he needed for the prior levels.
This is the final world Bottles appears in to teach the duo new abilities. He only teaches Turbo Talon Trot to them.
Points of interest[edit]
- Oasis
- King Sandybutt's Tomb
- Ziggurat
- Rubee's Pyramid
- Jinxy
- Ancient Door
- Puzzle Pyramid
- Grabba's Island
- Gobi's Island
Collectibles[edit]
Jiggies[edit]
- Grab Grabba's Jiggy: Grab the Jiggy from Grabba using the Turbo Trainers near the Water Pyramid (or by using a well-timed Beak Bomb).
- Complete the Matching Puzzle: Beak Bust the switch on top of one of the pyramids and quickly run into the newly opened doorway. Inside, Beak Bust the tiles around the floor to match up pairs of characters or items within the time limit. Once successful, a Jiggy will appear in the center of the room. The solution is listed below.
- Clear King Sandybutt's Tomb: In the center of the world, carefully jump onto the small pillars atop the moat and shoot eggs into the sphinx heads on the wall. Repeat this process with the next two sphinx heads and the main pyramid will rise from the ground in the very center of the moat. (Filling the moat with water will make this task much safer but is not necessary.) Once inside the pyramid, you must navigate your way through the maze within the time limit and once you reach the final room, the Jiggy will be inside a gold sarcophagus.
- Free Gobi: Near the Tile Puzzle pyramid, one will find Gobi strapped to a rock on a lone island. Ride the magic carpet to the island and use either Eggs or a Beak Buster on the rock to free him. A Jiggy will pop out of the sand shortly after.
- Help Trunker: After freeing Gobi, he will retreat to the small oasis at the entrance, seeking shade. Beak Bust his hump to expel his water into Trunker. Trunker will then elongate and a Jiggy will appear on top of him. To reach this Jiggy, you can fly to it, or simply jump onto him from a nearby tree.
- Search Jinxy's Temple: Jump to the cacti from Jinxy's nose. From there, shoot Eggs into both his nostrils. The door to Jinxy's temple will open and inside you must ride the carpets to the top of the room where the Jiggy awaits. To activate the carpets, you must shoot Eggs into the nearby sphinx heads on the walls, akin to Jiggy #3.
- Clear The Ancient Ones Challenge: Fly through all five of The Ancient One's rings and the Jiggy will appear on Jinxy's back near the Flight Pad. Their locations are all near Jinxy aside from one near the Tile Puzzle Pyramid. (The order they appear is random each save file.)
- Help Rubee and Toots: Beak Bomb the Kazooie target on one of the pyramids and enter before the time limit expires. Once inside, shoot Eggs from Kazooie's behind into the pot circling Histup's basket. When enough eggs are deposited, Histup will emerge and extend himself to the ceiling where the Jiggy awaits. Simply climb Histup to reach it.
- Access the Water Pyramid: Using a nearby pair of Turbo Trainers, step on the switch at the base of the Ziggurat-like building and quickly run to the very top of the structure. Drop into the passage before the time limit expires and swim down to the bottom of the pyramid to collect the Jiggy. (Be sure to collect the Mumbo Token toward the top of the room before collecting the Jiggy, as the water inside this temple will drain into the large moat outside once the Jiggy is collected, leaving the Mumbo Token inaccessible.)
- Find all 5 Jinjos.
This is the solution to the second Jiggy's puzzle:
| 3 | 6 | 1 | 1 |
| 4 | 7 | 8 | 2 |
| 5 | 4 | 3 | 5 |
| 7 | 8 | 2 | 6 |
An alternate method also exists to access the water pyramid for its Jiggy: the moat that gets filled with the pyramid's water has Fly Pads in the hot sand that Banjo can use to fly into the entrance. This requires a bit more precision, however, and once the moat is filled with water, the Fly Pads become unusable.
Jinjos[edit]
- Blue - At the bottom of the large moat in the center of the world. Can be obtained before or after the moat is flooded, though it is much safer to obtain when the moat is filled.
- Green - Behind the Tile Puzzle Pyramid..
- Orange - Inside Jinxy's Temple. After riding the first magic carpet, turn around to see the Jinjo atop a separate magic carpet.
- Purple - Inside King Sandybutt's Tomb, inside of a pink urn in the final chamber.
- Yellow - Directly behind the Exit Pad, sitting on a rock.
Extra Honeycombs[edit]
- Beak Bust a Honeycomb Switch behind the Tile Puzzle Pyramid and fly into the nearby cactus to collect the Extra Honeycomb Piece.
- After getting Trunker's Jiggy, Gobi will move to the entrance to the Blue Egg's chamber. Beak Bust him again for this Honeycomb.
Witch Switch[edit]
- Inside King Sandybutt's maze. The switch will open a sarcophogus in the fifth floor of Gruntilda's Lair, revealing a Jiggy inside of it. The Jiggy can be reached using the Shock Jump Disc circling the large urn.
Mumbo Tokens[edit]
- Above Jinxy's nose.
- Inside Jinxy, at the back of the room.
- Inside Rubee and Toots' Temple.
- In an urn in the final chamber of King Sandybutt's Tomb.
- In the Tile Puzzle Pyramid.
- In front of the exit of the Water Pyramid.
- In a corner to the right of Jinxy. Use Wading Boots to reach it.
- On the surface of the water inside the Water Pyramid. If the Jiggy inside this pyramid is collected, the Mumbo Token will be inaccessible due to the water being drained from the pyramid.
- At the bottom of the moat.
- At the very top of King Sandybutt's Pyramid.
Extra Lives[edit]
- In a corner directly behind Jinxy. Use Wading Boots to reach it.
- In the maze in King Sandybutt's Tomb.
- At the top of the Water Pyramid.
Stop 'n' Swop[edit]
- Blue Mystery Egg - The Blue Mystery Egg is in a room in the back of Gobi's Valley near Gobi's third hiding spot. You must hit the switch to open the sarcophagus, revealing the Egg.
Characters[edit]
Enemies[edit]
Banjo-Kazooie: Nuts & Bolts[edit]

- “Pyramid. This pyramid was torn out of Gobi's Valley in Banjo-Kazooie, much to the chagrin of its owner, King Sandybutt. L.O.G decided to bring it back to exploit its handy sloping sides.”
- —Banjoland description
King Sandybutt's Tomb appears as its own section in Banjoland, and is connected to parts of Clanker and the snowman of Freezeezy Peak. It was torn out of Gobi's Valley by L.O.G to use in Banjoland, and it is quite clear that King Sandybutt was not pleased. This also proves that King Sandybutt is still alive, and he may have moved elsewhere.
Banjo-Pilot[edit]
Gobi's Valley is a track in Banjo-Pilot is based off of Gobi's Valley. There are several pyramids that can be seen in the background as well as Jinxy. Gobi can also be seen on the course as an obstacle.
Gallery[edit]
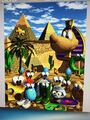
Gobi's Valley artwork render

Areas[edit]
Inside of Jinxy

Game chamber

Ziggurat

King Sandybutt's tomb
.png)
.png)
.png)
.png)
Screenshots[edit]
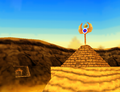
World entrance
Starting point
Rubee's Pyramid
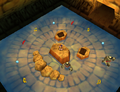
The interior of the Ziggurat
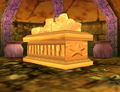
The Ancient Chamber of King Sandybutt's tomb


Nomenclature[edit]
| Language | Name | Meaning |
|---|---|---|
| French | Vallée de Gobi | Gobi's Valley |
| German | Gobi's Valley | Gobi's Valley |
| Italian | La Valle di Gobi | Gobi's Valley |
| Japanese | ゴビバレーさばく Gobi Barē Sabaku |
Gobi Valley Desert |
| Spanish | El Valle de Gobi (Nuts & Bolts) | Gobi's Valley |