Be sure to read our policy on citing sources before editing!
Difference between revisions of "Rusty Bucket Bay"
(→Jinjos: fix link) |
(double word #iwj) |
||
| (17 intermediate revisions by 8 users not shown) | |||
| Line 1: | Line 1: | ||
{{Cleanup|Wikia import}} | {{Cleanup|Wikia import (except for the opening paragraphs)}} | ||
{{Infobox world | {{Infobox world | ||
|image=[[File:Rusty Bucket Bay (B-K).png|200px]] | |image=[[File:Rusty Bucket Bay (B-K).png|200px]] | ||
|game=''[[Banjo-Kazooie]]'' | |game=''[[Banjo-Kazooie]]''<br>''[[Banjo-Pilot]]'' | ||
|theme=Cargo Ship Harbor | |theme=Cargo Ship Harbor | ||
|jiggies= | |jiggies=54 | ||
|transformation=N/A | |transformation=N/A | ||
}} | }} | ||
'''Rusty Bucket Bay''' is the eighth world of ''[[Banjo-Kazooie]]''. It consists of | {{Quote|My oily water, in you plunge, you'll lose air while in that gunge!|[[Gruntilda]]|[[Banjo-Kazooie]]}} | ||
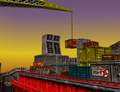
'''Rusty Bucket Bay''' is the eighth world of ''[[Banjo-Kazooie]]''. It consists of the harbor in which [[Gruntilda]]'s cargo ship, the [[Rusty Bucket]], is docked. | |||
To enter Rusty Bucket Bay, [[Banjo]] and [[Kazooie]] must first destroy a large gate near the [[Mad Monster Mansion]] entrance; they must then leave that world as [[Pumpkin Banjo]] and head to a room with [[Mumbo Jumbo]] only accessible with this transformation; Banjo must use Mumbo to turn back to normal, then perform the [[Beak Buster]] atop nearby casket to unlock a switch that raises the water level in the three rooms they had to go through to access Mad Monster Mansion's [[Jigsaw Picture]]. The duo has to then turn back into a pumpkin to leave. | |||
Rusty Bucket Bay requires 54 Jiggies to enter, including 12 for the level's own jigsaw puzzle. The intended method to access the Jigsaw Picture is to go back to the Mad Monster Mansion puzzle and use the [[Rat-a-Tat Rap]] to destroy a metal grate, then walk up a metal walkway. However, in the Rusty Bucket Bay entrance, there's another switch to raise the water level even higher; hitting this switch allows Banjo to access another entrance (this switch must be pressed by the time Banjo and Kazooie finish Rusty Bucket Bay so that they can access [[Click Clock Wood]]). | |||
==Points of interest== | ==Points of interest== | ||
*The [[Rusty Bucket]] | *The [[Rusty Bucket]] | ||
**[[Engine Room]] | **[[Engine Room]] | ||
**[[ | **[[Captain's Cabin|Captain's Cabin]] | ||
**[[Shipmate's Quarters]] | **[[Shipmate's Quarters]] | ||
**[[The Galley|The Ship's Kitchen]] | **[[The Galley|The Ship's Kitchen]] | ||
| Line 24: | Line 29: | ||
*Storage Sheds | *Storage Sheds | ||
*[[Snacker]]'s Pool | *[[Snacker]]'s Pool | ||
*The [[Egg]] | *The [[Egg]] tollbooths | ||
*[[Jinjo]] Prison | *[[Jinjo]] Prison | ||
| Line 34: | Line 39: | ||
#'''Raise the Crane:''' [[Beak Barge]] the switch on one of the cranes to lift the cage off the deck of the ship, then climb the crane and board the ship to snag the Jiggy before time runs out. | #'''Raise the Crane:''' [[Beak Barge]] the switch on one of the cranes to lift the cage off the deck of the ship, then climb the crane and board the ship to snag the Jiggy before time runs out. | ||
#'''Blow the Whistles:''' Enter the code "''312-111''" by Beak Busting the corresponding whistle switches towards the bow of the boat. During the puzzle, the level's music changes to a version with no whistle sounds, to avoid confusion with the puzzle's whistle sounds. A Jiggy will pop out if entered correctly. | #'''Blow the Whistles:''' Enter the code "''312-111''" by Beak Busting the corresponding whistle switches towards the bow of the boat. During the puzzle, the level's music changes to a version with no whistle sounds, to avoid confusion with the puzzle's whistle sounds. A Jiggy will pop out if entered correctly. | ||
#'''Break into the [[ | #'''Break into the [[Captain's Quarters]]:''' Break open a porthole toward the bow of the ship and jump into the hole. Inside, Beak Barge the small closet door and jump to get the Jiggy. Beware the [[Grille Chompa]] inside the closet! | ||
#'''Navigate the Engine Room:''' Enter the cowl ventilator on the stern of the ship and Beak Bust the fan switch inside. This will slow down the fans in the Engine Room, allowing access to the platform with the Jiggy. To enter the Engine Room, look for a small door on the smokestack closest to the stern and Beak Barge it. Once inside, carefully navigate your way through | #'''Navigate the Engine Room:''' Enter the cowl ventilator on the stern of the ship and Beak Bust the fan switch inside. This will slow down the fans in the Engine Room, allowing access to the platform with the Jiggy. To enter the Engine Room, look for a small door on the smokestack closest to the stern and Beak Barge it. Once inside, carefully navigate your way through the Engine Room's obstacles to reach the Jiggy. If at any point the duo loses a life, the fan switch must be activated again. | ||
#'''Swim through the Propellers:''' While inside the Engine Room, Beak Bust the two fan switches on each side of the room to halt the propellers of the ship. Once the second switch is activated, a timer will commence and the duo must reach the Jiggy behind the propellers before they reactivate. It is possible to reset the timer by Beak Busting either switch again, in case the player wants to better time it with the rotating platforms. This is commonly cited by players as the hardest Jiggy to obtain in the entire game. This is due to the sheer difficulty of navigating the Engine Room ''and'' the oily water, all while under a strict time limit. | #'''Swim through the Propellers:''' While inside the Engine Room, Beak Bust the two fan switches on each side of the room to halt the propellers of the ship. Once the second switch is activated, a timer will commence and the duo must reach the Jiggy behind the propellers before they reactivate. It is possible to reset the timer by Beak Busting either switch again, in case the player wants to better time it with the rotating platforms. This is commonly cited by players as the hardest Jiggy to obtain in the entire game. This is due to the sheer difficulty of navigating the Engine Room ''and'' the oily water, all while under a strict time limit. | ||
#'''Defeat [[Boss Boom Box]]:''' Beak Barge the switch on the opposite crane to Jiggy #4 and a TNT box will destroy the cover to the cargo hold below. Defeat Boss Boom Box inside and collect the Jiggy. | #'''Defeat [[Boss Boom Box]]:''' Beak Barge the switch on the opposite crane to Jiggy #4 and a TNT box will destroy the cover to the cargo hold below. Defeat Boss Boom Box inside and collect the Jiggy. | ||
| Line 52: | Line 57: | ||
===[[Witch Switch]]=== | ===[[Witch Switch]]=== | ||
*On top of a tower near the stern (or back) of ''[[The Rusty Bucket]]''. It is reached by double-jumping from the tip of the nearby crane (although this is difficult and requires precise timing of the second jump). | *On top of a tower near the stern (or back) of ''[[The Rusty Bucket]]''. It is reached by double-jumping from the tip of the nearby crane (although this is difficult and requires precise timing of the second jump). The Jiggy appears in the "icy" room prior to the entrance to this world. The water must be raised to reach it. | ||
===[[Mumbo Token]]s=== | ===[[Mumbo Token]]s=== | ||
* | *On a barrel in the toxic green pool. | ||
*Fire 6 eggs instead of just 2 into the 2 egg toll. The bridge will extend far enough for a normal Flap-Flip to reach the floating Mumbo Token. | *Fire 6 eggs instead of just 2 into the 2 egg toll. The bridge will extend far enough for a normal Flap-Flip to reach the floating Mumbo Token. | ||
*On a plank in the 1st blue warehouse. | |||
*On a yellow box in the 2nd blue warehouse. | |||
*At the very front of the ship, on the raised area. | |||
*At the top of the smokestack that doesn't have a Jiggy, accessed using a [[Shock Jump Pad]] on the highest narrow pathway around the smokestacks. | |||
*Behind the platform that holds the [[Witch Switch]], guarded by a [[Grille Chompa]]. | |||
*In the lifeboat at the furthest back of the ''[[Rusty Bucket]].'' | |||
*Inside an oven in the kitchen room. | |||
*Inside the navigation room. | |||
*On a cardboard box in the room with pipes and shelves. | |||
*On a blue bed in the crew quarters. | |||
*On the first C-shaped platform in the Engine Room. | |||
*Two tokens in the Engine Room (stop the engines before you get them!). | *Two tokens in the Engine Room (stop the engines before you get them!). | ||
===[[Extra Life|Extra Lives]]=== | ===[[Extra Life|Extra Lives]]=== | ||
*Destroy all of the Boom Boxes in one of the teal storage containers. | *Destroy all of the Boom Boxes in one of the teal storage containers. | ||
* | *Near the back of the Engine Room is a window with the propeller slowing switch visible. In front of it is the 1-up and 4 eggs. | ||
*Inside the storage hut between the entrance pad and Snacker's pool, on the top shelf. | *Inside the storage hut between the entrance pad and Snacker's pool, on the top shelf. | ||
| Line 71: | Line 83: | ||
*'''<font color="red">Red Mystery Egg</font>''' - After entering the code to unlock it, the [[Red Mystery Egg]] is found on the bed in the Captain's Cabin. | *'''<font color="red">Red Mystery Egg</font>''' - After entering the code to unlock it, the [[Red Mystery Egg]] is found on the bed in the Captain's Cabin. | ||
==Profiles== | |||
{{Quote|The cackling old crone has even got her own ship, though you'd be right to suspect that it's not the most cheerful vessel in the world. Everything on board seem to have a grudge against you, from the goblin crew right down to the very scenery including the funnel up on deck and the crates in the cargo hold! So be on your guard when exploring the ship its surrounding harbour...|''Banjo-Kazooie'', instruction booklet, page 30}} | |||
{{Quote|Don’t rock the boat! Stay away from my ship! You’ll be better off if this world you skip. Like the oil and water inside of the bay, you won’t mix well in this shipyard’s fray. My sailor boys will be sure to make you panic, and then you will sink like the boat named Titanic. And to me Tooty’s beauty then will go, to make me as pretty as that Leonardo DiCaprio!|Gruntilda|''Banjo-Kazooie'' Player's Guide, page 97}} | |||
==Characters== | ==Characters== | ||
*[[Snorkel]] | *[[Snorkel]] | ||
| Line 102: | Line 118: | ||
|FraM=Rusty Bucket Bay | |FraM=Rusty Bucket Bay | ||
|Jap = サビサビみなと | |Jap = サビサビみなと | ||
|JapR = | |JapR = Sabisabi Minato | ||
|JapM = Rusty Harbor | |JapM = Rusty Harbor | ||
|Ita = La Baia del Rusty Bucket | |Ita = La Baia del Rusty Bucket | ||
| Line 109: | Line 125: | ||
|GerM = Rusty Bucket Bay | |GerM = Rusty Bucket Bay | ||
}} | }} | ||
{{BK}} | {{BK}} | ||
[[Category:Worlds in Banjo-Kazooie]] | [[Category:Worlds in Banjo-Kazooie]] | ||
Latest revision as of 19:40, January 18, 2024
This article requires cleanup in order to qualify for Jiggywikki's standards.
Reason: Wikia import (except for the opening paragraphs)
You can discuss this issue on the talk page or edit this page to improve it.
.png)
| |
| Game appearance(s) | Banjo-Kazooie Banjo-Pilot |
| Theme | Cargo Ship Harbor |
| Jiggy requirement | 54 |
| Transformation | N/A |
- “My oily water, in you plunge, you'll lose air while in that gunge!”
- —Gruntilda, Banjo-Kazooie
Rusty Bucket Bay is the eighth world of Banjo-Kazooie. It consists of the harbor in which Gruntilda's cargo ship, the Rusty Bucket, is docked.
To enter Rusty Bucket Bay, Banjo and Kazooie must first destroy a large gate near the Mad Monster Mansion entrance; they must then leave that world as Pumpkin Banjo and head to a room with Mumbo Jumbo only accessible with this transformation; Banjo must use Mumbo to turn back to normal, then perform the Beak Buster atop nearby casket to unlock a switch that raises the water level in the three rooms they had to go through to access Mad Monster Mansion's Jigsaw Picture. The duo has to then turn back into a pumpkin to leave.
Rusty Bucket Bay requires 54 Jiggies to enter, including 12 for the level's own jigsaw puzzle. The intended method to access the Jigsaw Picture is to go back to the Mad Monster Mansion puzzle and use the Rat-a-Tat Rap to destroy a metal grate, then walk up a metal walkway. However, in the Rusty Bucket Bay entrance, there's another switch to raise the water level even higher; hitting this switch allows Banjo to access another entrance (this switch must be pressed by the time Banjo and Kazooie finish Rusty Bucket Bay so that they can access Click Clock Wood).
Points of interest[edit]
- The Rusty Bucket
- The Warehouses
- Cargo Cranes
- Toxic Waste Pool
- Three Blue Cargo Containers
- Storage Sheds
- Snacker's Pool
- The Egg tollbooths
- Jinjo Prison
Collectibles[edit]
Jiggies[edit]
- Climb the Crates: Enter the warehouse to the left of the Exit Pad, either through the main entrance or by Beak Busting the clear window on top and scale the crates and planks inside to reach the Jiggy.
- Save Snorkel: Rescue Snorkel from under the ship's anchor by following the chain up to a room inside the ship and Beak Busting the anchor switch. The Jiggy will appear in the same spot Snorkel was trapped.
- Reach the Top of the Ship: Follow the series of ladders and narrow pathways along the smokestacks to reach the Jiggy in one of the smokestacks.
- Raise the Crane: Beak Barge the switch on one of the cranes to lift the cage off the deck of the ship, then climb the crane and board the ship to snag the Jiggy before time runs out.
- Blow the Whistles: Enter the code "312-111" by Beak Busting the corresponding whistle switches towards the bow of the boat. During the puzzle, the level's music changes to a version with no whistle sounds, to avoid confusion with the puzzle's whistle sounds. A Jiggy will pop out if entered correctly.
- Break into the Captain's Quarters: Break open a porthole toward the bow of the ship and jump into the hole. Inside, Beak Barge the small closet door and jump to get the Jiggy. Beware the Grille Chompa inside the closet!
- Navigate the Engine Room: Enter the cowl ventilator on the stern of the ship and Beak Bust the fan switch inside. This will slow down the fans in the Engine Room, allowing access to the platform with the Jiggy. To enter the Engine Room, look for a small door on the smokestack closest to the stern and Beak Barge it. Once inside, carefully navigate your way through the Engine Room's obstacles to reach the Jiggy. If at any point the duo loses a life, the fan switch must be activated again.
- Swim through the Propellers: While inside the Engine Room, Beak Bust the two fan switches on each side of the room to halt the propellers of the ship. Once the second switch is activated, a timer will commence and the duo must reach the Jiggy behind the propellers before they reactivate. It is possible to reset the timer by Beak Busting either switch again, in case the player wants to better time it with the rotating platforms. This is commonly cited by players as the hardest Jiggy to obtain in the entire game. This is due to the sheer difficulty of navigating the Engine Room and the oily water, all while under a strict time limit.
- Defeat Boss Boom Box: Beak Barge the switch on the opposite crane to Jiggy #4 and a TNT box will destroy the cover to the cargo hold below. Defeat Boss Boom Box inside and collect the Jiggy.
- Find all 5 Jinjos.
Jinjos[edit]
- Blue - Inside the second teal storage container at the rim of the bay (enter it from above). He is behind a pile of boxes and is easiest found by ear.
- Green - On a floating barrel in the toxic green pool.
- Orange - in the corner of the level behind the ship. Fire eggs in the Egg Toll.
- Pink - In a large alcove underwater, under the grate that the beehive sits upon just to the right of the exit pad.
- Yellow - On a buoy with a yellow Jinjo flag on it in Snacker's pool.
Extra Honeycombs[edit]
- In the boathouse which can be accessed by a hole in the wall in Snacker's fenced pool. Activate the Extra Honeycomb switch inside and use the Flight Pad to reach it.
- In a small hexagonal window at the bottom of the tunnel which leads to the engine room.
Witch Switch[edit]
- On top of a tower near the stern (or back) of The Rusty Bucket. It is reached by double-jumping from the tip of the nearby crane (although this is difficult and requires precise timing of the second jump). The Jiggy appears in the "icy" room prior to the entrance to this world. The water must be raised to reach it.
Mumbo Tokens[edit]
- On a barrel in the toxic green pool.
- Fire 6 eggs instead of just 2 into the 2 egg toll. The bridge will extend far enough for a normal Flap-Flip to reach the floating Mumbo Token.
- On a plank in the 1st blue warehouse.
- On a yellow box in the 2nd blue warehouse.
- At the very front of the ship, on the raised area.
- At the top of the smokestack that doesn't have a Jiggy, accessed using a Shock Jump Pad on the highest narrow pathway around the smokestacks.
- Behind the platform that holds the Witch Switch, guarded by a Grille Chompa.
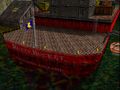
- In the lifeboat at the furthest back of the Rusty Bucket.
- Inside an oven in the kitchen room.
- Inside the navigation room.
- On a cardboard box in the room with pipes and shelves.
- On a blue bed in the crew quarters.
- On the first C-shaped platform in the Engine Room.
- Two tokens in the Engine Room (stop the engines before you get them!).
Extra Lives[edit]
- Destroy all of the Boom Boxes in one of the teal storage containers.
- Near the back of the Engine Room is a window with the propeller slowing switch visible. In front of it is the 1-up and 4 eggs.
- Inside the storage hut between the entrance pad and Snacker's pool, on the top shelf.
Stop 'n' Swop[edit]
- Red Mystery Egg - After entering the code to unlock it, the Red Mystery Egg is found on the bed in the Captain's Cabin.
Profiles[edit]
- “The cackling old crone has even got her own ship, though you'd be right to suspect that it's not the most cheerful vessel in the world. Everything on board seem to have a grudge against you, from the goblin crew right down to the very scenery including the funnel up on deck and the crates in the cargo hold! So be on your guard when exploring the ship its surrounding harbour...”
- —Banjo-Kazooie, instruction booklet, page 30
- “Don’t rock the boat! Stay away from my ship! You’ll be better off if this world you skip. Like the oil and water inside of the bay, you won’t mix well in this shipyard’s fray. My sailor boys will be sure to make you panic, and then you will sink like the boat named Titanic. And to me Tooty’s beauty then will go, to make me as pretty as that Leonardo DiCaprio!”
- —Gruntilda, Banjo-Kazooie Player's Guide, page 97
Characters[edit]
Enemies[edit]
Gallery[edit]
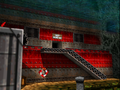
World entrance
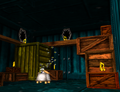
Starting point
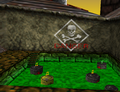
The poisonous waste pool
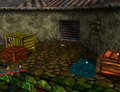
Inside a blue cargo container
Rear view of the Rusty Bucket
A bird's-eye view of the Rusty Bucket


Names in other languages[edit]
| Language | Name | Meaning |
|---|---|---|
| French | Baie du Rusty Bucket | Rusty Bucket Bay |
| German | Rusty Bucket Bay | Rusty Bucket Bay |
| Italian | La Baia del Rusty Bucket | Rusty Bucket Bay |
| Japanese | サビサビみなと Sabisabi Minato |
Rusty Harbor |
| Spanish | La Bahía del Cubo Oxidado (Nuts & Bolts) | Rusty Bucket's Bay |