Be sure to read our policy on citing sources before editing!
Category:Banjo-Tooie screenshots
From Jiggywikki, a Banjo-Kazooie wiki
Jump to navigationJump to search
The printable version is no longer supported and may have rendering errors. Please update your browser bookmarks and please use the default browser print function instead.
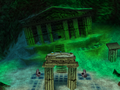
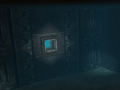
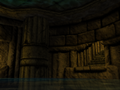
Screenshots that are featured in Banjo-Tooie.
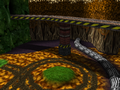
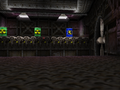
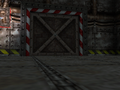
Media in category "Banjo-Tooie screenshots"
The following 200 files are in this category, out of 447 total.
(previous page) (next page) Grunty Industries building.png 640 × 480; 321 KB
 Grunty Industries entrance.png 640 × 361; 252 KB
 Grunty Industries entry.png 640 × 480; 260 KB
 Grunty Industries first floor.png 640 × 480; 315 KB
 Grunty Industries fourth floor.png 640 × 480; 225 KB
 Grunty Industries roof.png 640 × 480; 263 KB
 Grunty Industries Train Station.png 640 × 361; 241 KB
 Grunty Industries.png 640 × 480; 637 KB
 Guffo BT.png 263 × 312; 114 KB
 Hag 1 BT behind.png 640 × 480; 143 KB
 Hag 1 BT explosion.png 640 × 480; 187 KB
 Hag 1 BT intro.png 640 × 480; 130 KB
 Hag 1.png 1,024 × 576; 402 KB
 Hailfire Peaks (coloseum kickball challenge).png 640 × 480; 652 KB
 Hailfire Peaks (coloseum kickball stadium).png 640 × 480; 530 KB
 Hailfire Peaks (ice crater).png 640 × 480; 509 KB
 Hailfire Peaks (icicle grotto).png 640 × 480; 687 KB
 Hailfire Peaks (lava crater).png 640 × 480; 480 KB
 Hailfire Peaks (train station) 1.png 640 × 480; 465 KB
 Hailfire Peaks (train station) 2.png 640 × 362; 531 KB
 Hailfire Peaks (volcano inside).png 640 × 480; 365 KB
 Hailfire Peaks entry.png 640 × 480; 182 KB
 Hailfire Peaks fire.jpg 436 × 294; 105 KB
 Hailfire Peaks Icy Side.png 640 × 360; 405 KB
 Hailfire Peaks Lava Side.png 640 × 360; 498 KB
 Hak.jpg 261 × 319; 47 KB
 Heggy Egg Shed exterior.png 640 × 480; 204 KB
 Heggy Egg Shed interior.png 640 × 480; 214 KB
 Honey B (BT).png 400 × 657; 184 KB
 Honey B Hive BT outside.jpg 640 × 480; 114 KB
 Honey B's Hive BT.png 640 × 480; 234 KB
 Honey Pot.png 632 × 427; 237 KB
 Hoop Hurry Challenge.jpg 636 × 475; 29 KB
 Hothand.jpg 429 × 386; 16 KB
 Icicle Grotto.jpg 1,920 × 1,080; 199 KB
 Illuminus.png 427 × 427; 241 KB
 Inky BT image.jpg 304 × 228; 34 KB
 Inky.png 558 × 480; 226 KB
 Inside the Cheese Wedge.png 766 × 409; 784 KB
 Inside the Mountain.jpg 638 × 475; 54 KB
 Isle O' Hags (Wooded Hollow).png 640 × 480; 574 KB
 Jade Snake Grove.jpg 638 × 478; 51 KB
 Jamjars BT ending.png 420 × 359; 190 KB
 Jamjars BT screenshot.jpg 340 × 279; 57 KB
 Jiggywiggy's Challenge 1.png 1,508 × 734; 1,011 KB
 Jinjo Village (Bottles's house).png 640 × 480; 512 KB
 Jinjo Village (Jinjo's house).png 640 × 480; 394 KB
 Jinjo Village.png 640 × 480; 765 KB
 Jippo Jim Alien.png 93 × 139; 14 KB
 Jippo Jim Cowboy.png 168 × 251; 34 KB
 Jippo Jim Monster.png 130 × 167; 21 KB
 Jippo Jim.png 121 × 182; 23 KB
 Jolly Roger B-T ending.png 263 × 360; 116 KB
 Jolly Roger's Lagoon (ancient swimming baths).png 640 × 480; 509 KB
 Jolly Roger's Lagoon (atlantis).png 640 × 480; 640 KB
 Jolly Roger's Lagoon (big fish).png 640 × 480; 683 KB
 Jolly Roger's Lagoon (dave jones' locker).png 640 × 480; 306 KB
 Jolly Roger's Lagoon (eletric eels's lair).png 640 × 480; 373 KB
 Jolly Roger's Lagoon (emporium).png 640 × 480; 476 KB
 Jolly Roger's Lagoon (jolly's).png 640 × 480; 549 KB
 Jolly Roger's Lagoon (sea bottom).png 640 × 480; 598 KB
 Jolly Roger's Lagoon (seaweed sanctum).png 640 × 480; 570 KB
 Jolly Roger's Lagoon (smugglers' cavern).png 640 × 479; 449 KB
 Jolly Roger's Lagoon (temple of the fishes).png 640 × 480; 547 KB
 Jolly Roger's Lagoon (water supply pipe).png 640 × 480; 570 KB
 Jolly Roger's Lagoon (waverace hire).png 640 × 480; 645 KB
 Jolly Roger's Lagoon entrance.png 640 × 480; 235 KB
 Jolly Roger's Lagoon.png 640 × 480; 540 KB
 Jolly's bar interior.png 640 × 480; 208 KB
 Jolly's bar outside.png 640 × 480; 231 KB
 Jolly's bar rental room.png 640 × 480; 191 KB
 Jolly's bar warehouse.png 640 × 480; 160 KB
 Jollys Tavern.png 408 × 362; 139 KB
 Keelhaul.png 571 × 550; 181 KB
 Kickball Colosseum exterior.jpg 433 × 313; 108 KB
 King Jingaling zombie.jpg 415 × 309; 26 KB
 King Jingaling.png 444 × 433; 164 KB
 Klang.jpg 202 × 215; 27 KB
 Klungo beaten.png 437 × 353; 188 KB
 Klungo first battle BT.png 640 × 480; 235 KB
 Klungo in Spiral Mountain (BT).png 250 × 195; 40 KB
 Krop.jpg 267 × 337; 52 KB
 Loggo B-T.png 320 × 435; 163 KB
 Loggo Mario reference BT.png 1,280 × 720; 642 KB
 Loggo Mario reference.jpg 320 × 240; 18 KB
 Lord Woo Fak Fak B-T ending.jpg 600 × 450; 28 KB
 Lord Woo Fak Fak BT bleeding.png 498 × 283; 118 KB
 Lord Woo Fak Fak.jpg 533 × 323; 18 KB
 Madame Grunty's Tent.png 640 × 480; 196 KB
 Mayahem Temple (code chamber).png 640 × 480; 481 KB
 Mayahem Temple (columns vault).png 640 × 480; 439 KB
 Mayahem Temple (jade snake grove).png 640 × 480; 531 KB
 Mayahem Temple (kickball challenge).png 640 × 480; 638 KB
 Mayahem Temple (maya kickball stadium).png 640 × 480; 526 KB
 Mayahem Temple (prison compound).png 640 × 480; 600 KB
 Mayahem Temple (targitzan's sacred chamber).png 640 × 362; 343 KB
 Mayahem Temple (treasure chamber).png 640 × 480; 808 KB
 Mayahem Temple entrance.png 640 × 480; 337 KB
 Mayahem Temple.jpg 640 × 480; 253 KB
 Mayan Kickball Tournament.jpg 701 × 481; 64 KB
 Mega-Glowbo 2.png 640 × 480; 135 KB
 Mega-Glowbo.png 634 × 476; 158 KB
 Merry Maggie Malpass BT ending.png 412 × 336; 166 KB
 Mingella and Blobbelda BT intro.png 640 × 480; 152 KB
 Mingella BT.png 402 × 606; 311 KB
 Mingy Jongo screenshot.png 358 × 346; 98 KB
 Minion chasing Banjo BT screenshot.png 320 × 239; 106 KB
 Minjo B-T.png 149 × 202; 30 KB
 Moggy B-T screenshot.jpg 223 × 206; 15 KB
 Mr Fit BT ending.png 300 × 355; 99 KB
 Mr Patch BT promo image.jpg 304 × 228; 40 KB
 Mr Patch.jpg 298 × 305; 16 KB
 Mrs Boggy B-T.png 334 × 293; 78 KB
 Mrs Bottles B-T ending.png 265 × 355; 91 KB
 Mucoid.png 251 × 264; 54 KB
 Mumbo Pad.jpg 400 × 300; 76 KB
 Mumbo's Skull in Mayahem Temple BT.jpg 400 × 300; 88 KB
 Mumbo's Skull in Witchyworld Inferno BT.jpg 388 × 453; 29 KB
 Nutta.png 287 × 295; 98 KB
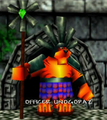 Officer Unogopaz B-T ending.png 358 × 402; 201 KB
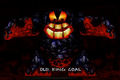 Old King Coal BT Character Parade.png 532 × 354; 147 KB
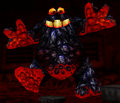 Old King Coal.png 454 × 390; 99 KB
 Oogle Boogle BT ending.png 362 × 284; 67 KB
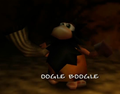
 Oogle Boogle.png 242 × 268; 32 KB
 Oogle Boogles Cave.png 640 × 478; 258 KB
 Oxygen bar B-T.jpg 95 × 360; 7 KB
 Pansie.png 475 × 417; 138 KB
 Pawno BT ending.png 350 × 336; 124 KB
 Pawno Emporium items.jpg 640 × 480; 143 KB
 Pawno's Emporium.jpg 640 × 480; 227 KB
 Peck B-T.png 640 × 480; 219 KB
 Piggles BT.png 408 × 425; 129 KB
 Pine Grove B-T.png 640 × 480; 397 KB
 Pine Grove Witchyworld entry.png 478 × 267; 145 KB
 Plateau.png 640 × 480; 436 KB
 Power Hut B-T switch.jpg 640 × 400; 23 KB
 Prison Compound entrance.png 640 × 474; 387 KB
 Prison Compound path.png 640 × 474; 432 KB
 Prison Compound.png 640 × 474; 214 KB
 Proximity Egg nest B-T.png 346 × 261; 71 KB
 Pump Master 2.jpg 478 × 291; 24 KB
 Quagmire BT view.png 476 × 268; 174 KB
 Quagmire.png 640 × 480; 603 KB
 Quality Control B-T.png 640 × 480; 206 KB
 Repair Depot B-T.png 640 × 480; 192 KB
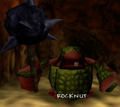 Rocknut BT ending.png 430 × 385; 144 KB
 S'Hard.png 186 × 348; 57 KB
 Sabreman BT introduction.jpg 267 × 200; 20 KB
 Sabreman.png 640 × 480; 155 KB
 Sack Pack.jpg 320 × 188; 11 KB
 Salty Joe BT ending.png 337 × 372; 97 KB
 Scrat B-T ending.png 247 × 313; 92 KB
 Scrit B-T.jpg 640 × 480; 172 KB
 Scrotty B-T ending.png 493 × 390; 238 KB
 Scrut.jpg 639 × 481; 30 KB
 Seemee.jpg 640 × 480; 216 KB
 Service Elevator.jpg 464 × 323; 28 KB
 Sewer Entrance B-T.png 640 × 480; 249 KB
 Shrapnels B-T.png 647 × 315; 178 KB
 Shrink B-T.png 640 × 361; 312 KB
 Signpost.jpg 618 × 457; 27 KB
 Skivvy BT ending.png 210 × 363; 90 KB
 Smuggler's Cavern 2.jpg 693 × 357; 24 KB
 Smuggler's Cavern.jpg 789 × 576; 52 KB
 Snapdragon.png 281 × 444; 123 KB
 Snowball Banjo.png 314 × 306; 66 KB
 Soarasaurus.png 661 × 458; 217 KB
 Soggy B-T ending.png 242 × 335; 75 KB
 Soggy B-T.png 464 × 480; 140 KB
 Speccy B-T screenshot.png 401 × 300; 89 KB
 Spiral Mountain (beind the waterfall).png 640 × 480; 529 KB
 Spiral Mountain (gruntilda's lair).png 640 × 480; 365 KB
 Spiral Mountain 3.png 640 × 480; 688 KB
 Split-Up Pads.png 550 × 284; 193 KB
 Split-up.png 526 × 303; 134 KB
 Springy Step Shoes.jpg 800 × 600; 130 KB
 Sput Sput.png 195 × 307; 53 KB
 Ssslumber BT.png 421 × 402; 173 KB
 Star Spinner BT.png 640 × 360; 232 KB
 Stomping Plains BT.png 600 × 480; 368 KB
 Stomponadon BT.jpg 785 × 450; 63 KB
 Stony B-T.jpg 395 × 445; 38 KB
 Stony Banjo B-T.png 271 × 243; 61 KB
 Submarine Banjo BT.png 294 × 295; 68 KB
 Superstash.png 393 × 309; 115 KB
 Swellbelly.png 358 × 382; 119 KB
 T-Rex Banjo BT.jpg 518 × 286; 146 KB
 Talon Torpedo B-T.jpg 449 × 319; 16 KB
 Talon Torpedo Door BT screenshot.png 464 × 347; 285 KB
 Targitzan B-T ending.png 419 × 394; 161 KB
 Targitzan B-T full body.jpg 353 × 353; 127 KB
 Targitzan's Temple Challenge.jpg 802 × 461; 22 KB
 Taxi Pack.jpg 640 × 480; 134 KB
 Temple of the Fishes.jpg 530 × 437; 35 KB
 Terry's baby BT.png 358 × 342; 91 KB
 Terry.png 735 × 698; 336 KB
 Terrydactyland (bonfire cavern).png 640 × 480; 430 KB
 Terrydactyland (mountain inside).png 640 × 480; 583 KB
 Terrydactyland (oogle boogle's cave).png 640 × 480; 394 KB
 Terrydactyland (stomping plains).png 640 × 481; 482 KB


.png)
.png)
.png)
.png)
.png)
_1.png)
_2.png)
.png)


.png)


.png)


.png)
.png)


.png)
.png)
.png)
.png)
.png)
.png)
.png)
.png)
.png)
.png)
.png)
.png)
.png)


.png)


.png)
.png)
.png)
.png)
.png)
.png)
.png)
.png)


.png)
.png)


.png)
.png)
.png)
.png)